Learn the commands to install SQLite Database server on Ubuntu 20.04, 18.04, or 21.04 for creating and managing Databases using it.
What is SQLite?
In spite of the many options available for database systems, SQLite is the standard and most simple system. This free, compact, and command-line database program allows you to share data easily with others and save it in a simple format. It is a widely used database application in computers, smartphones, and other everyday applications.
Also, the SQLLite format is used for many desktop applications such as CAD programs, version control systems, record-keeping tools, financial analysis tools, media catalogs, and so forth.
This type of database engine is sometimes called an embedded database as well since you can run it as a part of another program. SQLite becomes even more powerful with the SQLite browser as it is a graphical and completely free software platform for developing and designing SQLite databases. These codes are free to use for private and commercial purposes because SQLite is part of the public domain.
Installing SQLite can be an easy task, but it requires correct knowledge. That’s why we have written this tutorial to give you in-depth details on installing and using SQLite on Ubuntu 20.04.
Contents
Now let’s take a look at the method to install SQLite’s latest version in the Ubuntu machine.
Step 1: Initially, update your system as per the latest available updates:
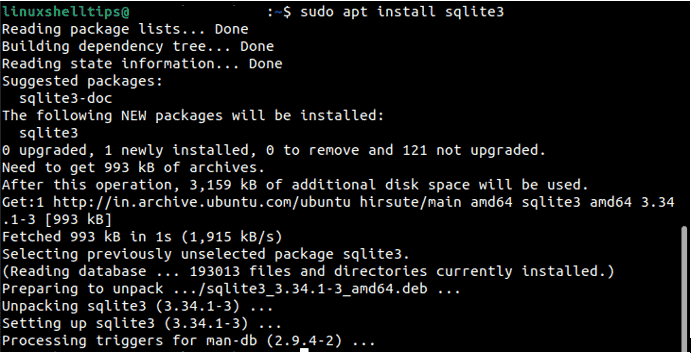
Step 2: Now you can install the SQLite (the latest version of SQLite is 3.3 while doing this tutorial):
Step 3: Verify the version of SQLite through the below command:
Tables are the building blocks of SQLLite databases, and they store data. Let’s make a “CAR” database with a table that has different columns for different data:
Now, execute this command in order to create the database file:
You will see that the prompt will change to sqlite> after executing the command. Here we created a database named “CAR.db.”
To insert the values into the database file, follow these steps:
To insert values into a table, the general form is:
In the above command line, tablename is the table’s name, and values are enclosed in parentheses.
Now we can insert rows of the VALUES into the CAR table:
The NOT NULL markings are applied to every variable, so every row must contain some values.
With “SELECT” and “*”(all) in the terminal, you can access the table:
For viewing a specific value according to its id, then use the following command:![]()
Use the ALTER TABLE command to change the table values. This command allows an individual to add or modify columns in a table.
The “UPDATE” command is used for changing the values of a table. So use the below command:
As the argument evolves, we can delete the values from SQLite. We are deleting values whose pricing is less than 1500000 in this example.
SQLite’s first row was deleted by the above command.
We can join the information of different through the following join commands:
Now, we will create a new table and then execute the INNER JOIN for joining the data.
As you can see in the image above, we have created an availability table. To join the “CAR” and “Availability” tables, we will use the following command:
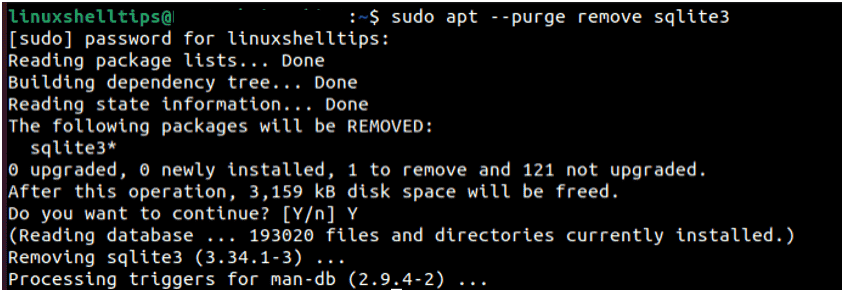
You can execute the following command to uninstall SQLite:
SQLite is a powerful tool when creating database programs in Linux. We have covered the creation, use, and modification of databases using SQLite on Linux in our tutorial. Hopefully, this tutorial has been helpful to you. If so, please visit more on our website.
Heyan Maurya Ubuntu
Heyan Maurya Ubuntu
15283 Views
Heyan Maurya CentOS, Linux, Ubuntu
11040 Views
Heyan Maurya Ubuntu
document.getElementById( “ak_js_1” ).setAttribute( “value”, ( new Date() ).getTime() );
This site uses Akismet to reduce spam. Learn how your comment data is processed.
Linux Shout crafted as a part of our main portal H2S Media to publish Linux related tutorials and open source Software.


