SonarQube is an open-source program to analyze the code quality, formerly it was known as Sonar. Here we will let you know the commands and steps to install SonarQube on Ubuntu 20.04/18.04 LTs server
This program can find the security vulnerabilities in more than 20 programming languages along with auto analyzing of code quality to detect code bugs and smells. It also offers reports on duplicated code, coding standards, unit tests, code coverage, code complexity, comments, bugs, and security vulnerabilities.
Contents
The first thing we should do before installing any software on Linux using command terminal is running of update command, thus run:
Java is one of the requirements to install and set up SonarQube on Ubuntu 20.04 or 18.04 and its based operating systems.
Increase the Virtual memory
Reboot your system once…
The latest version of Sonar cannot run under root user, thus we will create a new user to access only Sonarqube installation.
Add user
Set password for the created user
Note: you can change sonarh2s with whatever username and password you want to set.
Ubuntu’s base repository doesn’t have the latest version of PostgreSQL thus to get the latest one, we have to add its repo manually. Here is the command to do that.
Add GPG key:
Add repo:
Run system update
Install PostgreSQL 13
You can check the status of its service using
1. Once the installation is completed, let’s create a PostgreSQL database for Sonarqube but before that set password:
2. Switch to postgres user. Use the password you have set above.
3. Now, create a new user that will access the database we will create for Sonarqube.
Note: Change sonaruser in the above command with whatever you want to use.
4. Switch to the PostgreSQL shell.
5. To secure a newly created user, set a password for the same using the below syntax:
Note: change the bold items with whatever you want to use.
6. Create a new database for PostgreSQL database by running:
Note: You can use the DB name as per your choice and also don’t forget to replace the user in the above command with the one you have created.
7. Exit from the psql shell:
8. Get back to your system user
While writing this article the latest version of the Sonarqube was v-9.0.1 available to download. However, you can directly visit the official website to get the latest version. You can also visit the download page and copy the link to download with wget command, as we have done here:
Extract and move to /opt directory:
Note: If you have downloaded the file using the browser then you have to first switch to the Downloads directory before running the above commands
1. Open the configuration file:
2. Now, add the following lines:
As shown in the screenshot, copy-paste the following lines. After that change the bold values:
Just replace these values with what you have used while creating a database on Postgresql for Sonarqube.
command explanation:
sonaruser – is a database username
yourpassword – is the database password
sonardb– is the database name we have created
To save and exit the file- press Ctrl+X and then type- Y and hit the Enter key.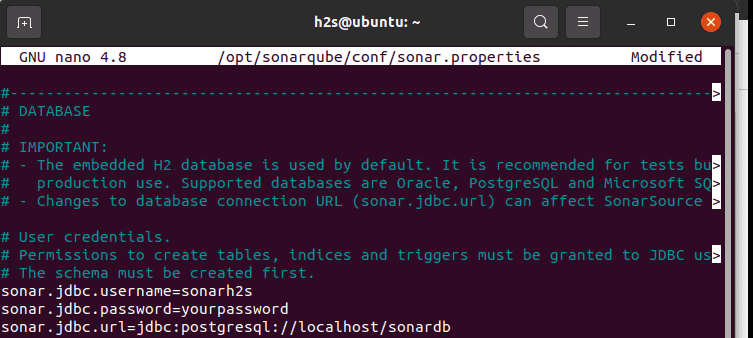
By default, there will be no service file for Sonarqube to start it in the background and with system boot. Hence, we have to create one manually. Here is the way:
Copy-paste the following lines:
Note: Replace the value of User and Group with the username that you have created at the beginning of the article for Sonarqube.
Save the file- press Ctrl+X then type- Y and hit the Enter key.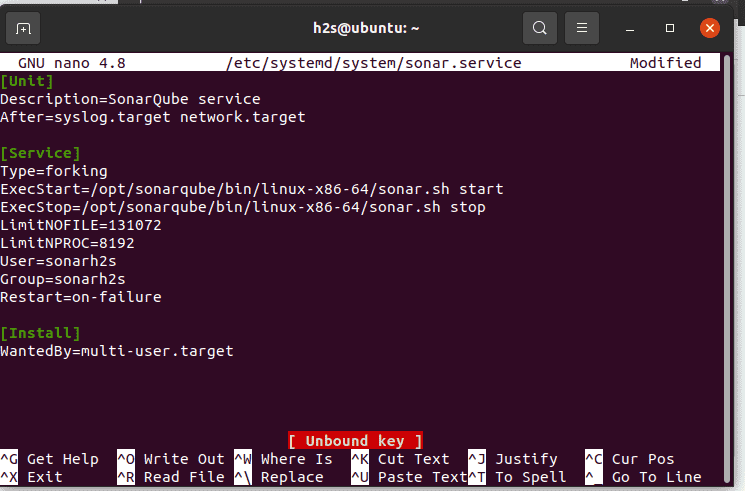
Reload the daemon:
Then start and enable the service
Now, check whether the create Sonarqueb service running or not 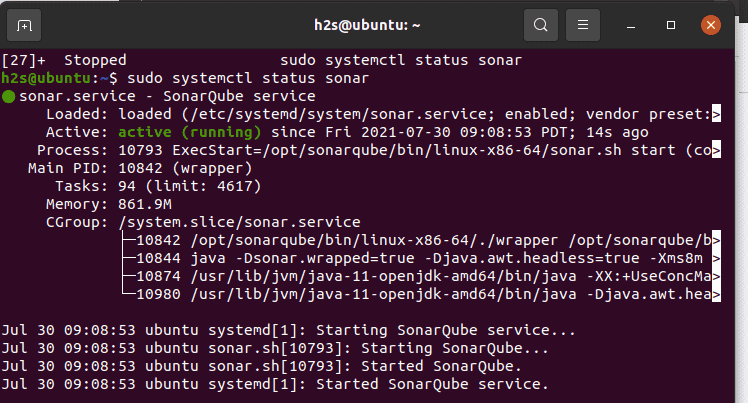
[optional] Alternatively, you can also use the below commands to start, stop, and check status:
To get the console output to know what is happening while starting the Sonarqube server you can use:
This will be helpful in resolving some errors.
To access the web interface of Sonarqube you have to open its default 9000 port in your Ubuntu system’s firewall:
Finally, open any browser that can access the IP address or domain of the server where you have installed Sonarqube. And point it to-
Note: Replace server-ip-addres with your server/desktop IP address or domain name.
Once you see the login screen, use the default Sonarqube username and password that is admin.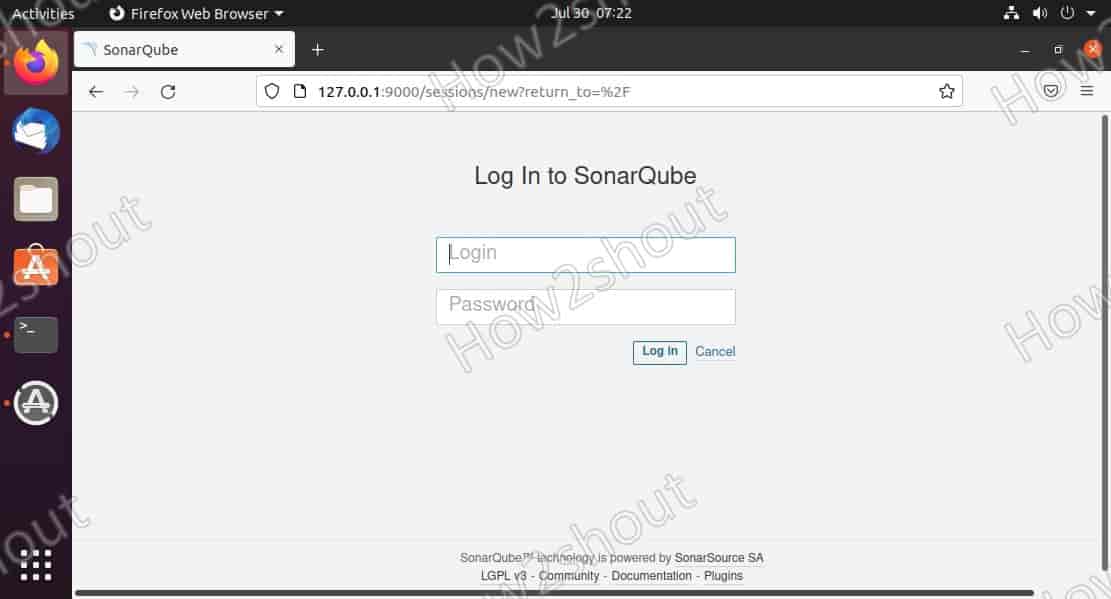
when it asks you to change the old password, do that.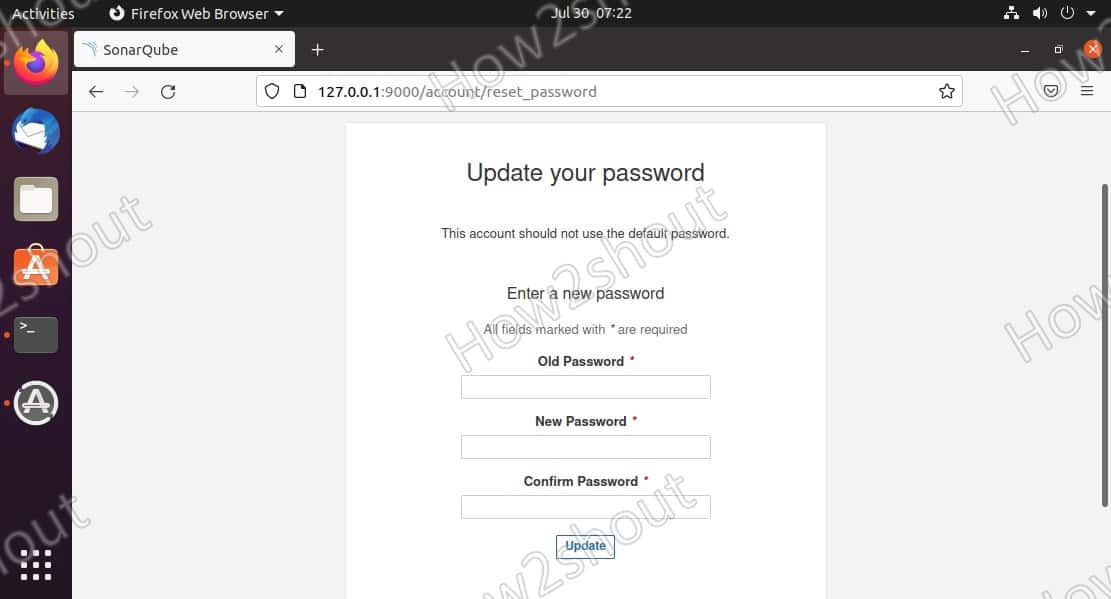
Other Articles:
♦ Steps for Installing Postgresql in Ubuntu 20.04 LTS
♦ How to install Debian Linux server on Windows 10 without Virtualbox
♦ Use RDP on Linux mint to access Windows 11/10/7
♦ How to access Ubuntu or Mint via RDP from Windows 7/10/11 to
Heyan Maurya Linux
Heyan Maurya Ubuntu
631 Views
Heyan Maurya Ubuntu
9267 Views
Heyan Maurya Ubuntu
document.getElementById( “ak_js_1” ).setAttribute( “value”, ( new Date() ).getTime() );
This site uses Akismet to reduce spam. Learn how your comment data is processed.
Linux Shout crafted as a part of our main portal H2S Media to publish Linux related tutorials and open source Software.


